AWS Elastic Beanstalk Configuration for Spring Boot App
ADVERTISEMENT
Table of Contents
- Introduction
- What is AWS Elastic Beanstalk?
- Java SE Platform on Elastic Beanstalk
- Setting up an Elastic Beanstalk environment
- Configuring Elastic Beanstalk
- Configuring Spring Boot Application
- Conclusion
Introduction
In this article, we'll discuss how to set up and configure Amazon Web Services (AWS) Elastic Beanstalk to host Spring Boot applications.
What is AWS Elastic Beanstalk?
Elastic Beanstalk is an AWS service that allows web applications to be easily deployed in the cloud with minimal work by developers. This allows developers to focus more on writing their code and less on setting up and configuring hosting environments. The packaged code can simply be uploaded to Elastic Beanstalk, which will deploy it into a webserver environment pre-configured by the developer.
Elastic Beanstalk supports applications written in Go, Java, .NET, Node.js, PHP, Python, and Ruby. In this case, we'll be discussing the configuration process for Java applications, specifically using the Spring Boot framework. Elastic Beanstalk offers two platforms for hosting Java applications - the Tomcat platform and the Java SE platform.
Java SE Platform on Elastic Beanstalk
We will be using the Java SE platform, which automatically spins up an EC2 instance pre-configured with load balancer, nginx webserver software, and a logging system that deposits logs in an S3 bucket. The developer just needs to upload a compiled JAR file containing the application code and it will automatically be deployed to the webserver stack. New application versions can be redeployed at any time, software updates can be managed automatically by AWS, and health checks and alerting functionalities are available.
The Elastic Beanstalk console can be used to adjust configuration parameters for the environment at any time. Furthermore, developers can optionally include a Procfile into their code bundle to configure the processes running on the EC2 instance, or a Buildfile allowing code compilation to be performed as a part of the deployment process.
There is no additional charge for using the Elastic Beanstalk service. Pricing is based off of the resources (such as EC2 instances) that are used by the environment.
Setting up an Elastic Beanstalk environment
To set up a new Elastic Beanstalk environment, follow these steps:
- Navigate to the Elastic Beanstalk service in the AWS console and click Create a new environment.

- Choose the Web server environment radio button and click the Select button.
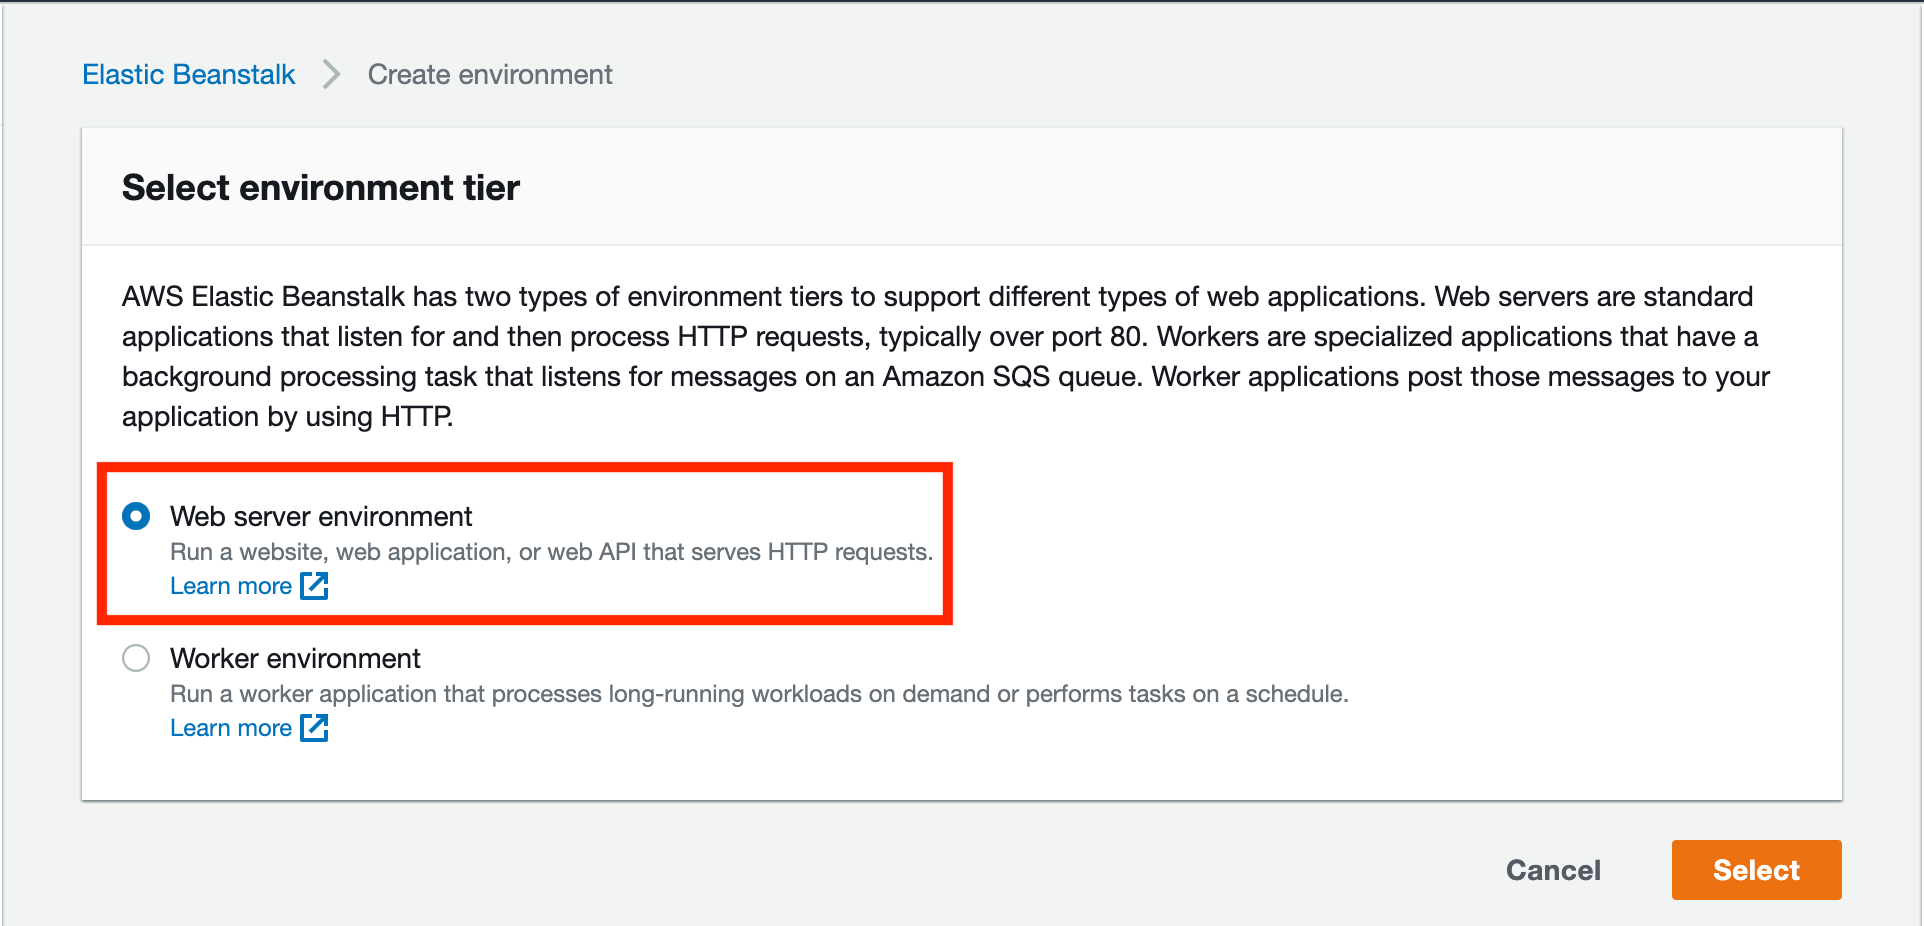
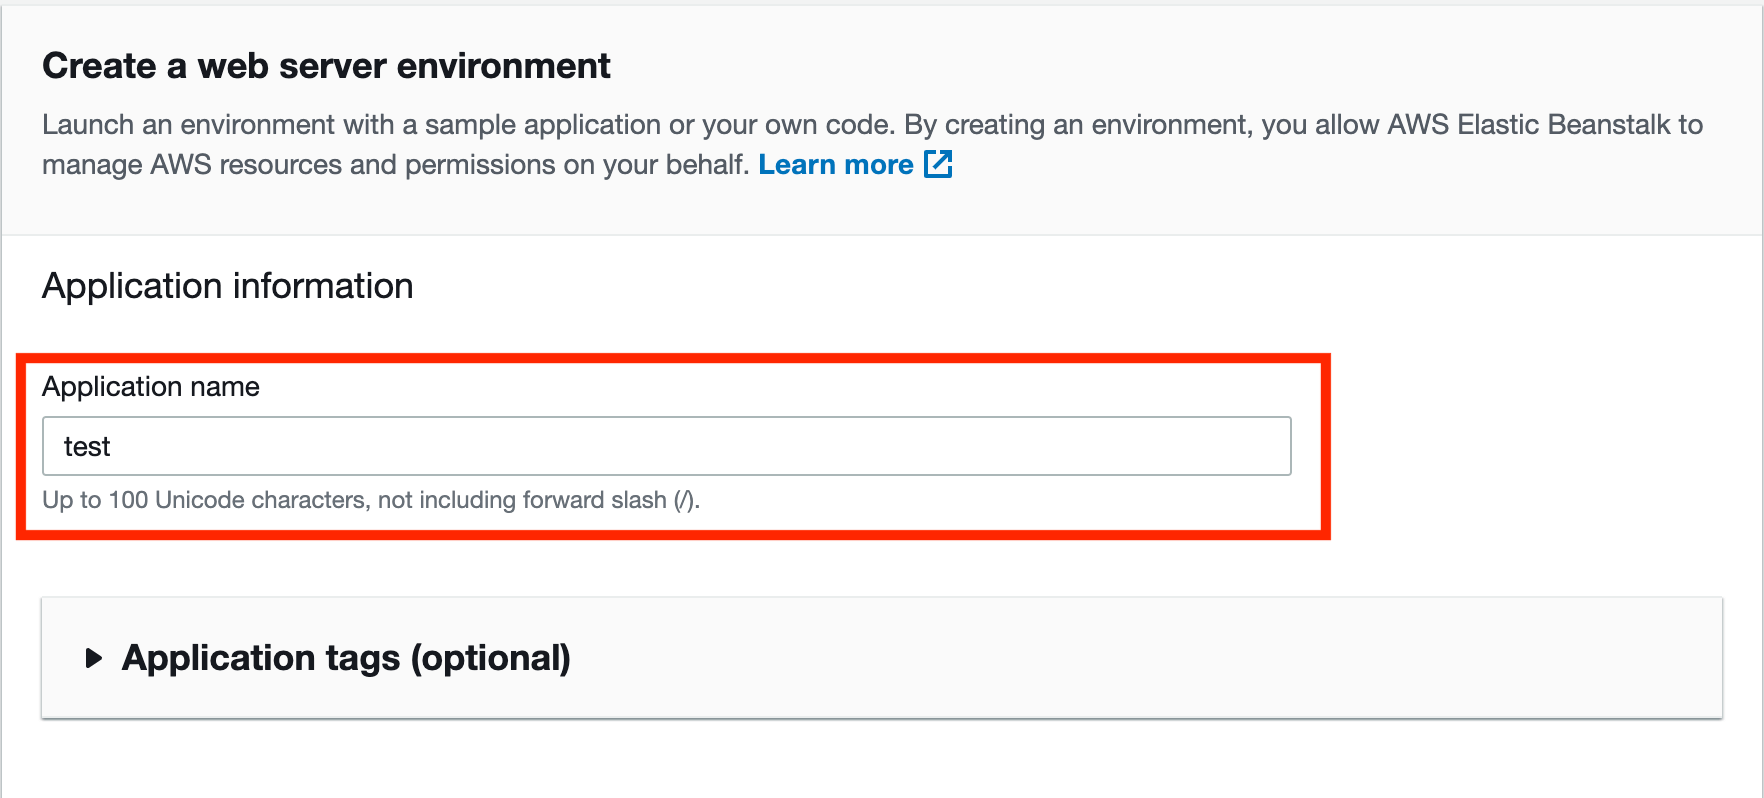
- Enter a name for your application in the Application name box.
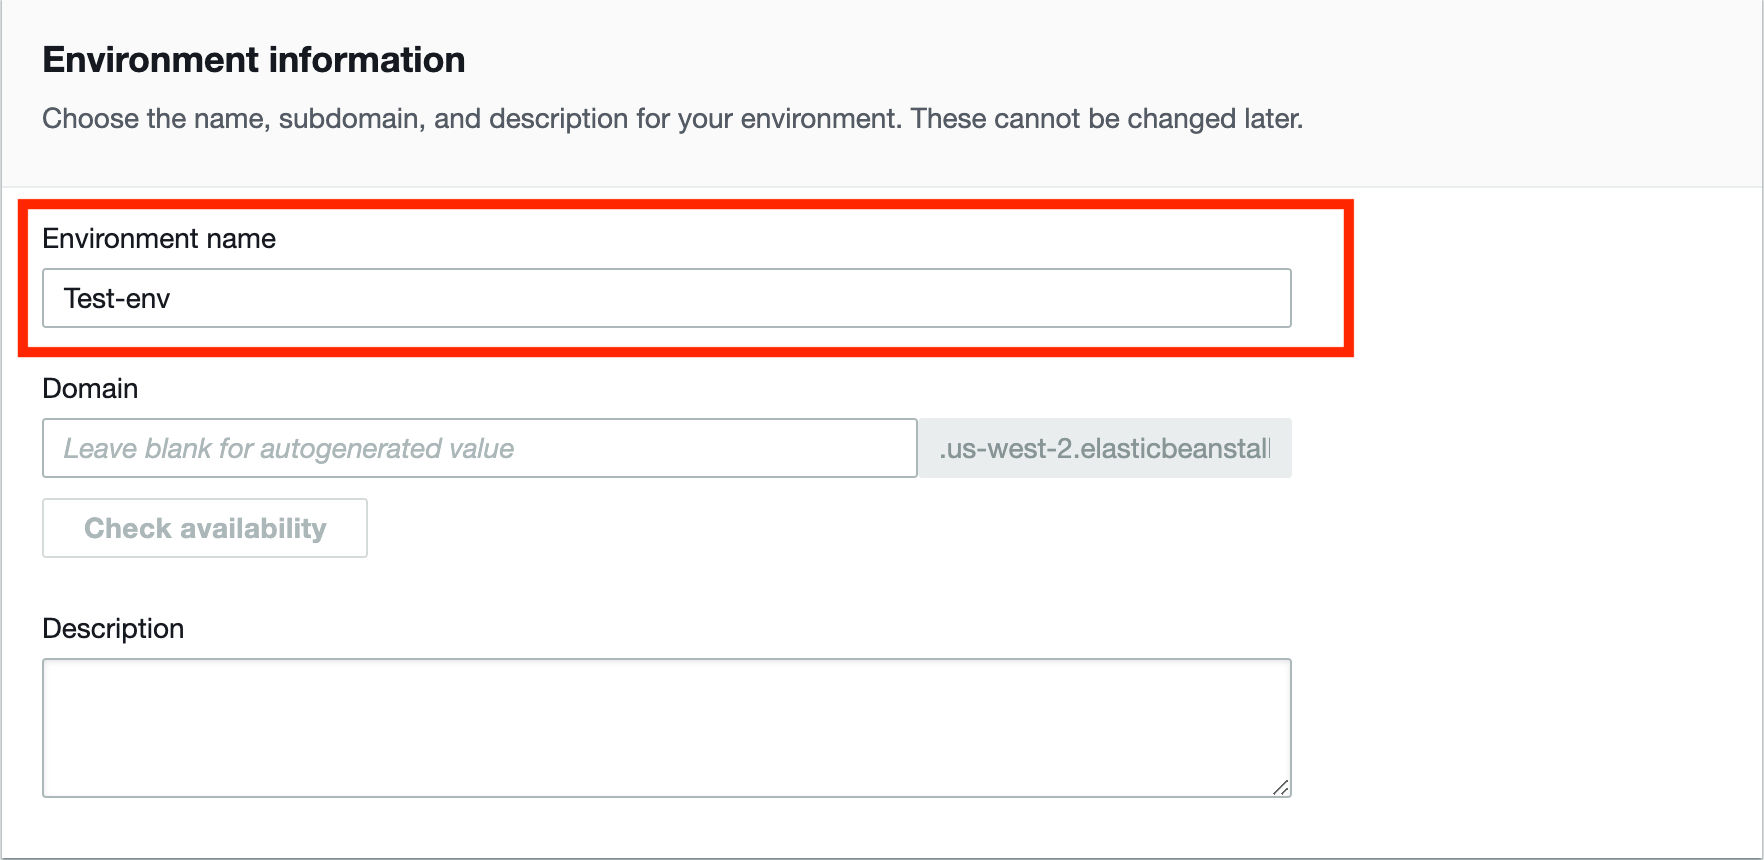
- Enter a name for your environment in the Environment name box.
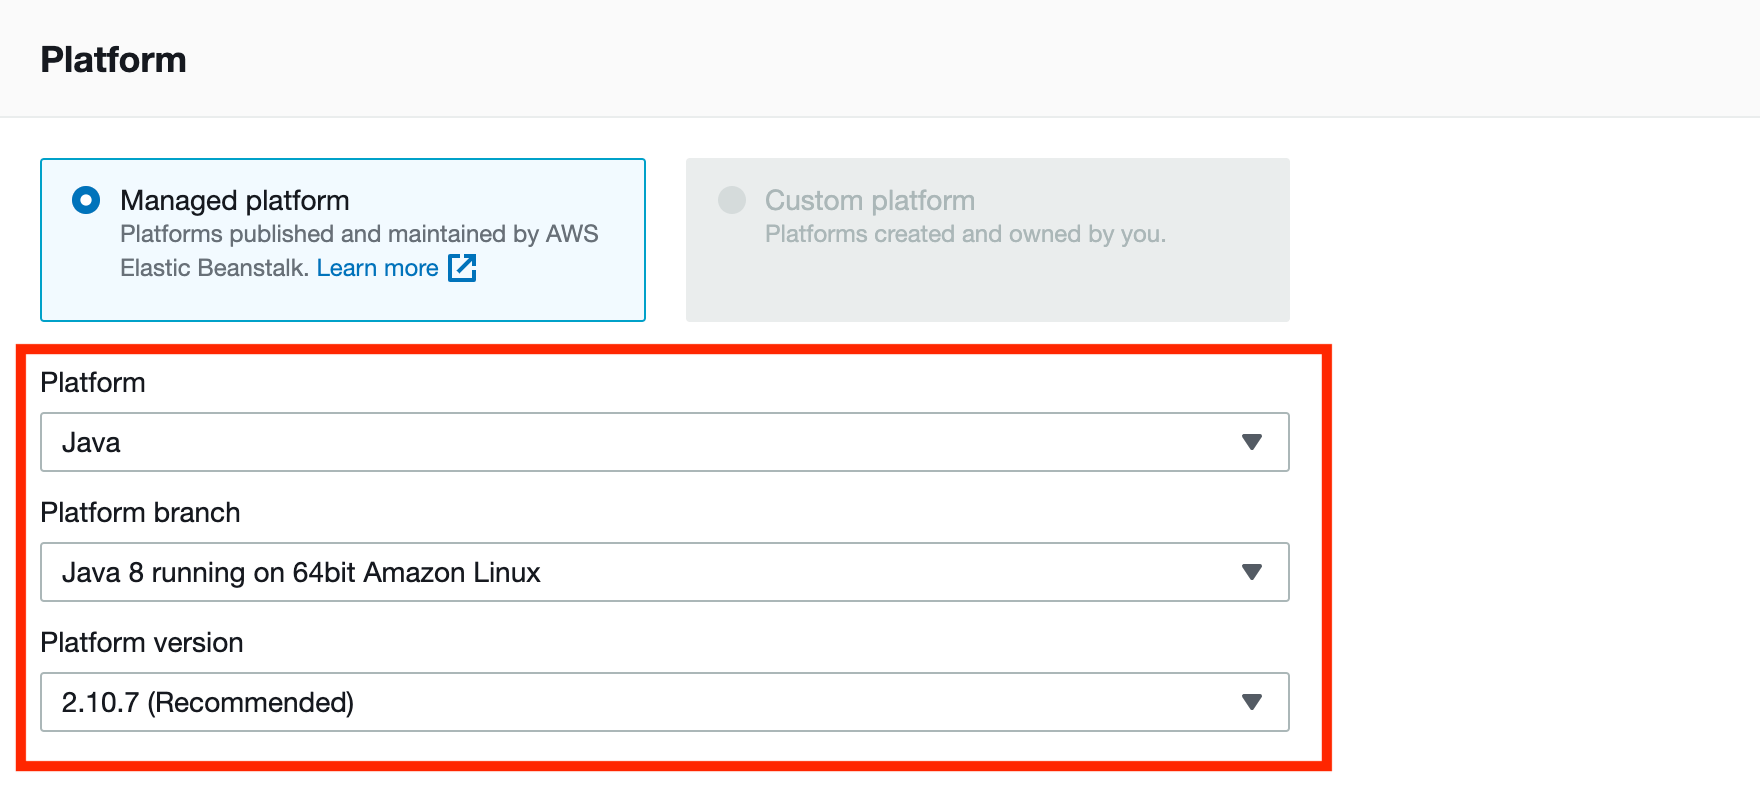
- Choose the Managed platform option, and select Java from the platform dropdown menu, and the version of the Java environment you'd like to create.
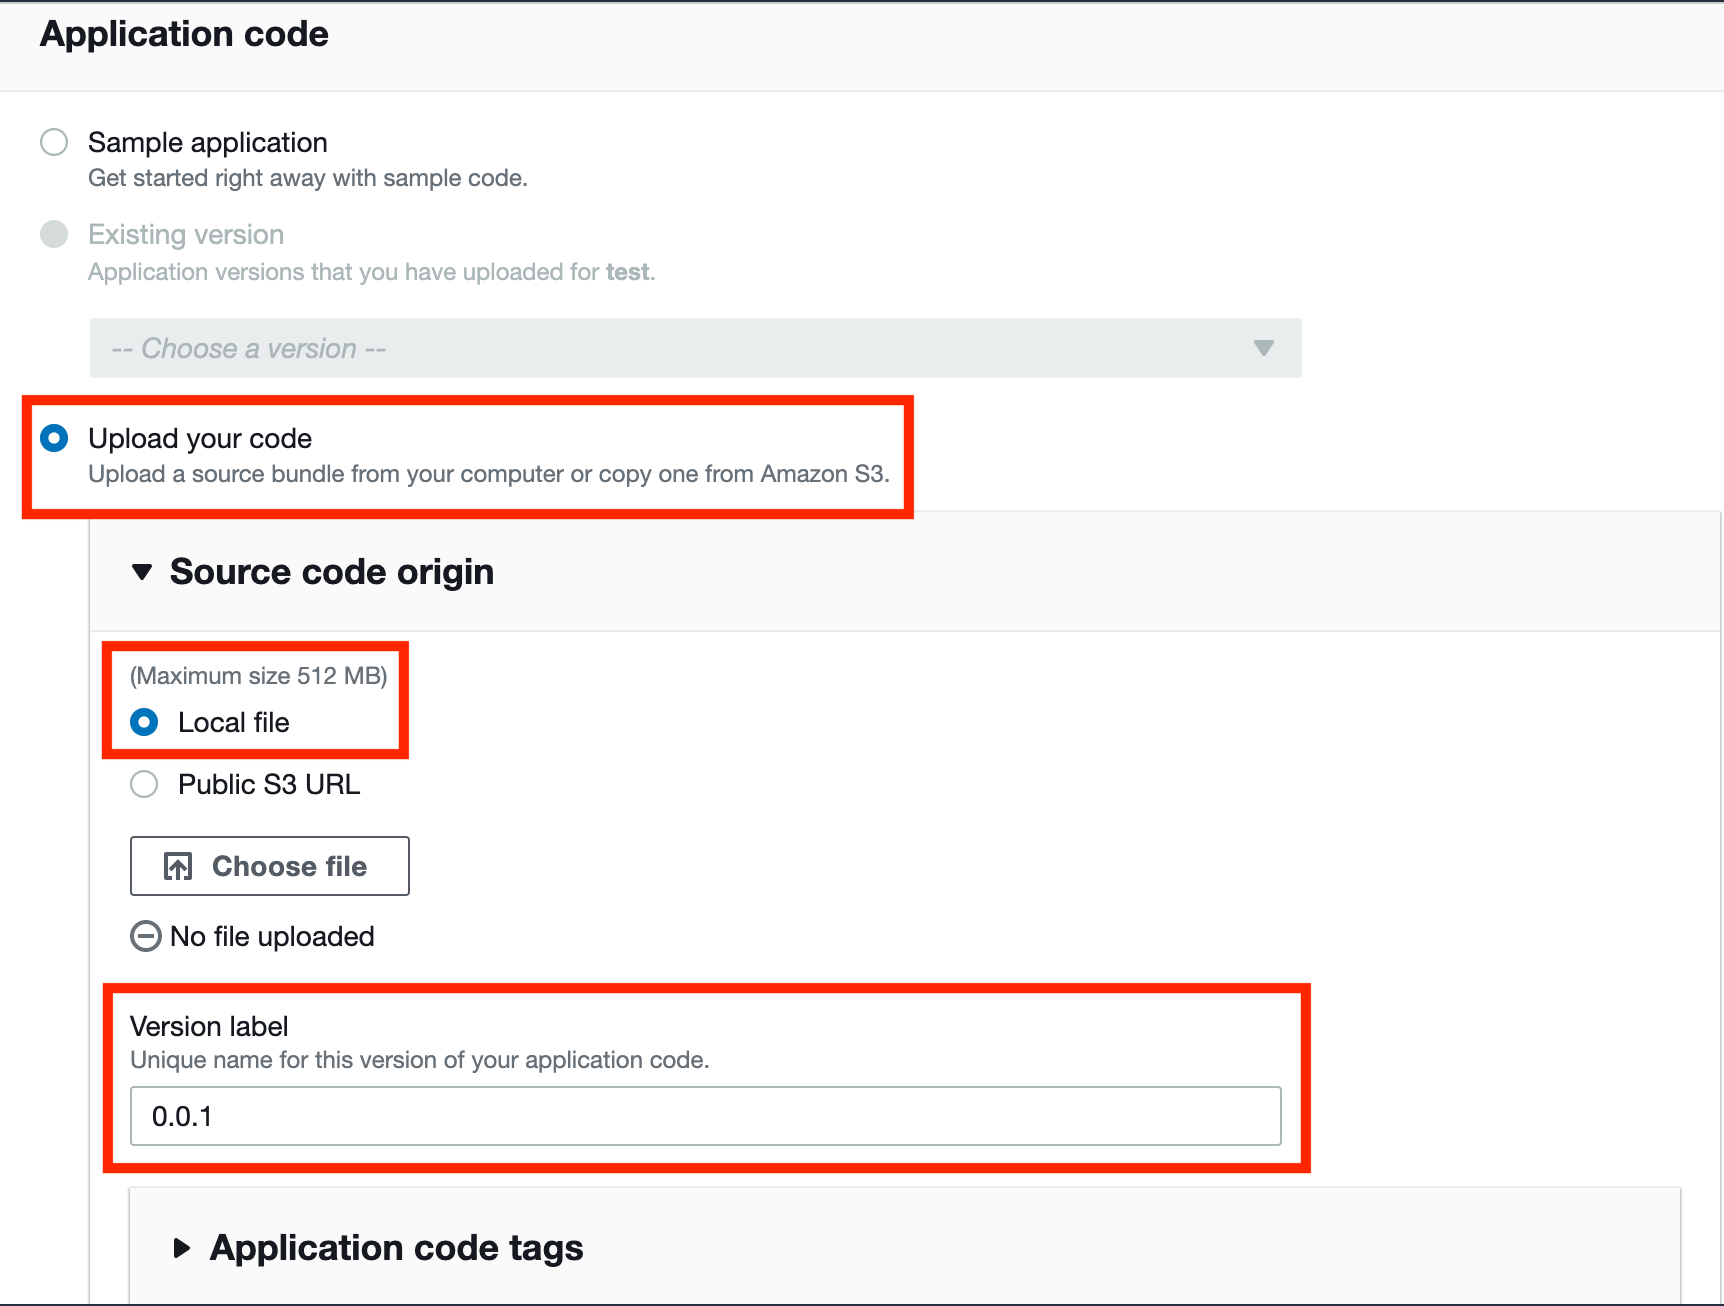
- Upload your application code bundle as a JAR file, and set the version appropriately.
- Click the Create environment button and wait for the environment to start up.
Configuring Elastic Beanstalk
Now that the application is up and running, additional configuration changes can be made at any time in the Elastic Beanstalk console. To do this, click on the environment you want to edit, and choose the Configuration link in the left sidebar:
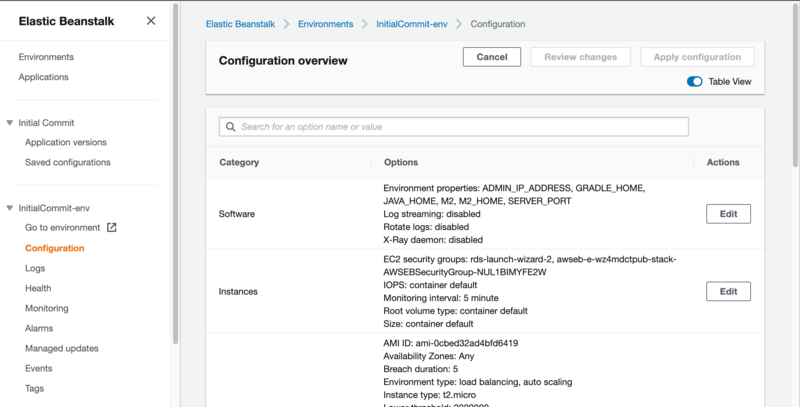
This will display the configuration page, listing available configuration options including:
- Software (environment variables and logging options)
- Instances (EC2 instance options, security group mappings)
- Capacity (Resource allocation and scaling options)
- Load balancer (Load balancing options)
- Rolling updates and deployments (to limit downtime during upgrades)
- Security (accessibility via keypairs, IAM profiles, service roles)
- Monitoring
- Managed updates (select between automated and manual update triggers)
- Notifications (email alerting options)
- Network (VPC inclusion)
- Database
Here are some of the Elastic Beanstalk configurations that I use for hosting the Initial Commit website.
- On-demand EC2 instance pricing model, supplemented with reserved instances to reduce costs
- t2.micro instance type, which includes 2 virtual CPUs, variable ECU (Elastic Compute Units), 1 GB of memory, and costs $0.0116 per hour to run (after 1 year of free-tier expires)
- Set max number of instances to 1, so that I don't get unexpected upcharges for environment scaling
- Classic load balancer listening on HTTP port 80 and HTTPS port 443
- JVM and nginx logs stored automatically in S3 bucket
- Email notifications enabled for my email address
Configuring Spring Boot Application
There are some additional configurations that need to be done in the Spring Boot application itself in order to play nice with Elastic Beanstalk. Notably, in order to automatically redirect HTTP requests to HTTPS, the following steps must be completed:
- Add the following directory tree in the root of your application code Git repository:
.ebextensions/nginx/conf.d/elasticbeanstalk/
- Create a new file in this location called
00_application.confwith the following content:
location / {
     set $redirect 0;
     if ($http_x_forwarded_proto != "https") {
       set $redirect 1;
     }
     if ($http_user_agent ~* "ELB-HealthChecker") {
       set $redirect 0;
     }
     if ($redirect = 1) {
       return 301 https://$host$request_uri;
     }

     proxy_pass          http://127.0.0.1:5000;
     proxy_http_version  1.1;

     proxy_set_header    Connection          $connection_upgrade;
     proxy_set_header    Upgrade             $http_upgrade;
     proxy_set_header    Host                $host;
     proxy_set_header    X-Real-IP           $remote_addr;
     proxy_set_header    X-Forwarded-For     $proxy_add_x_forwarded_for;
}
This will add some nginx configurations to redirect incoming HTTP requests to HTTPS.
- In the Java application
pom.xmlfile (inside the<plugins>...</plugins>tag, add the following plugin code to copy the configuration file into the build:
<plugin>
    <groupId>org.apache.maven.plugins</groupId>
    <artifactId>maven-antrun-plugin</artifactId>
    <executions>
        <execution>
            <id>prepare</id>
            <phase>package</phase>
            <configuration>
                <tasks>
                    <unzip src="${project.build.directory}/${project.build.finalName}.jar" dest="${project.build.directory}/${project.build.finalName}" />
                    <copy todir="${project.build.directory}/${project.build.finalName}/" overwrite="false">
                        <fileset dir="./" includes=".ebextensions/**"/>
                    </copy>
                    <zip compress="false" destfile="${project.build.directory}/${project.build.finalName}.jar" basedir="${project.build.directory}/${project.build.finalName}"/>
                </tasks>
            </configuration>
            <goals>
                <goal>run</goal>
            </goals>
        </execution>
    </executions>
</plugin>
This will invoke the maven-antrun-plugin plugin to copy the nginx configuration file into the JAR file when we build the application using Maven. Note that in order for HTTPS to work properly for the deployed site, HTTPS must be enabled in the load balancer security group and your website's domain must be pointed to the Elastic Beanstalk environment URL, ideally via the AWS Route 53 service.
Conclusion
In this article, we described what AWS Elastic Beanstalk is, how to set it up and configure it to host a Spring Boot application, and how to configure the Spring Boot application itself.
Once you have everything successfully configured and deployed on AWS, you may want to look into options for monitoring your application - which is a very important part of the application lifecycle.
Final Notes
Recommended product: Coding Essentials Guidebook for Developers


