Build & Deploy a Spring Boot App on AWS Elastic Beanstalk

ADVERTISEMENT
Table of Contents
- Introduction
- Confirm the App Version Using Git
- Build the Spring Boot App Using Apache Maven
- Deploy the Spring Boot App on AWS Elastic Beanstalk
- Conclusion
Introduction
In this article, we'll discuss how to build and deploy a Spring Boot app on Amazon Web Services (AWS) Elastic Beanstalk.
Confirm the App Version Using Git
Before immediately building and deploying an app, it is important to check that the correct version of the codebase is checked out. To do this I use the git log command:
commit 66c47033c6dc0e0f40a6880f58e986ce999c4ea0 (HEAD -> master, origin/master)
Author: Jacob Stopak <jacob@initialcommit.io>
Date:   Sun May 17 00:04:34 2020 -0700

    Bump version to 0.1.4

commit 344b45f24eb2cec0284695624ce497777e4a8b9e
Author: Jacob Stopak <jacob@initialcommit.io>
Date:   Sun May 17 00:04:09 2020 -0700

    Update scrolling speed for blog post related post carousel
...
In this case, I can tell that the current branch is on the correct version I want to deploy, since I bumped the version number to 0.1.4 in the most recent commit (there are no stray commits after the most recent version bump). Next I run the git status command to make sure the working directory is clean and that I'm on the right branch:
On branch master
Your branch is up to date with 'origin/master'.

nothing to commit, working tree clean
Now that the app version for deployment is confirmed, let's move on to building the app.
Build the Spring Boot App Using Apache Maven
The build process that I use involves includes linking dependencies, compiling the Java code, running tests, and packaging the codebase as an executable JAR file. Maven is a build tool used primarily for Java projects that makes this process very easy. In order to supply different sets of application properties for development and production environments, I use Maven profiles defined in the pom.xml as follows:
<profiles>
	<profile>
	    <id>dev</id>
	    <properties>
	        <activatedProperties>dev</activatedProperties>
	    </properties>
	    <activation>
	        <activeByDefault>true</activeByDefault>
	    </activation>
	</profile>
	<profile>
	    <id>prod</id>
	    <properties>
	        <activatedProperties>prod</activatedProperties>
	    </properties>
	</profile>
</profiles>
This allows me to set up different environment configurations for dev and prod, such as database connection information, Google Analytics IDs, static resource location, logging settings, error display settings, and more. For dev and prod, these properties are defined in resource files named application-dev.properties and application-prod.properties, respectively.
Since the tag <activeByDefault>true</activeByDefault> is set in the dev profile (see above), the dev profile (and properties) will be used by default when no profile is specified in the Maven build command, like this:
mvn clean install
To build and package the production version of the application, I run Maven like this:
mvn -Pprod clean install
The -P flag is used to specify the profile to use in the build process, which will apply all of the configuration properties defined in the application-prod.properties resource file.
The result of running this command is an executable Java JAR file called initialcommit-0.1.4-SNAPSHOT.jar, located in the ./target directory in the root of the project.
This file is ready to be uploaded and deployed on AWS Elastic Beanstalk.
Deploy the Spring Boot App on AWS Elastic Beanstalk
Deploying the application JAR file to an existing AWS Elastic Beanstalk environment is as easy as uploading the file, setting the version number, and clicking a button. This example assumes that you have already created and configured an AWS Elastic Beanstalk environment.
-
Log into AWS, navigate to the Elastic Beanstalk service, and click the link for your existing environment.
-
Click the Upload and deploy button.

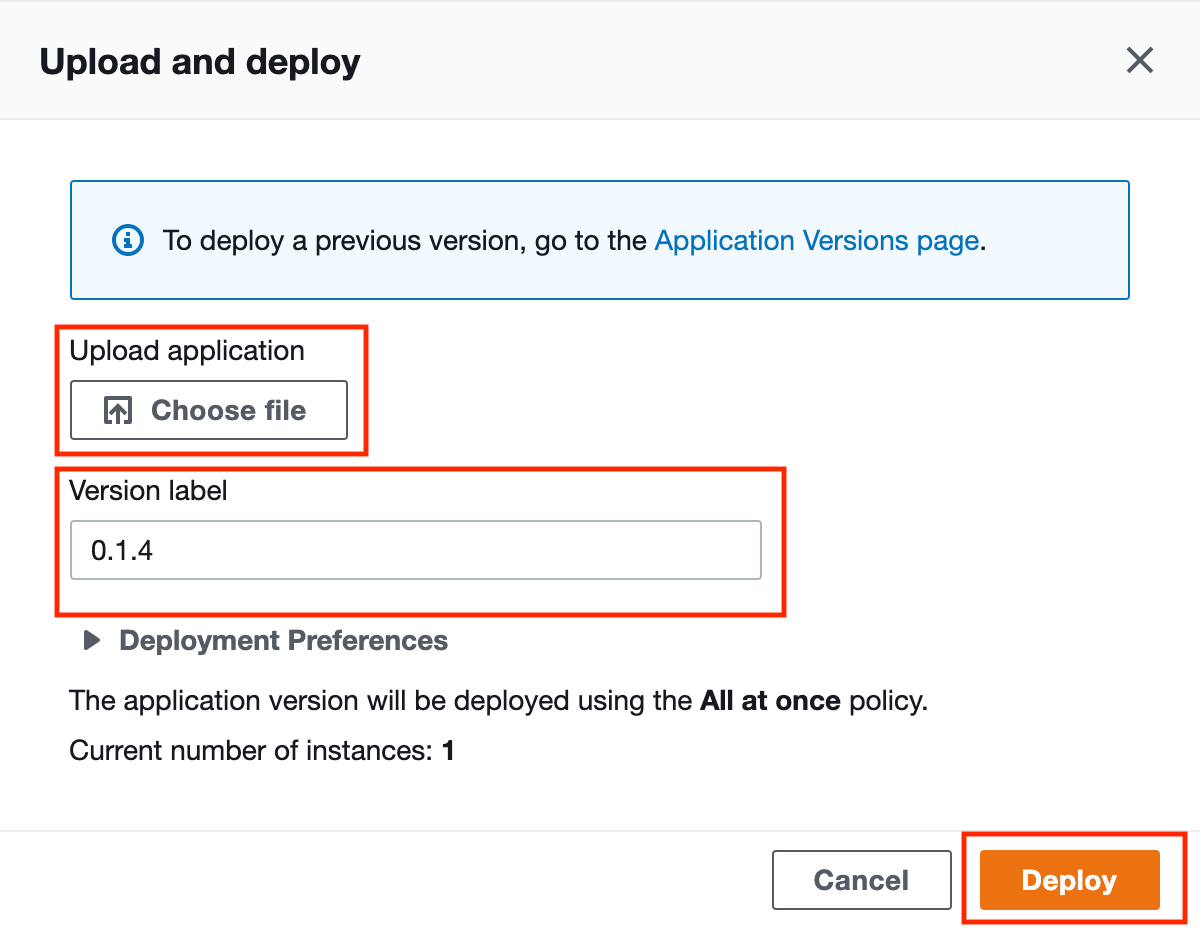
- Upload the JAR file, set the version label, and click the Deploy button.

- Wait for the application to deploy. You'll know its ready when the health indicator turns back into a green checkmark!
You should now be able to successfully hit the domain for your website or application and test to ensure the code changes in the release were applied.
Conclusion
In this article, we described how to confirm the app version is ready for deployment, how to build the Spring Boot app using Maven's profile functionality, and how to deploy the app on AWS Elastic Beanstalk.
Final Notes
Recommended product: Coding Essentials Guidebook for Developers


