Hosting a Static Site on AWS S3
ADVERTISEMENT
Table of Contents
- Introduction
- Background
- 1. Create an S3 bucket
- 2. Upload site files to your bucket
- 3. Configure your bucket for static site hosting
- 4. Make your site files publicly accessible
- Conclusion
Introduction
Amazon Web Services S3 is the premier platform for hosting static files. AWS makes it easy to upload full websites - plain HTML/CSS/JS and React/Vue/Angular projects alike - and serve them to the public, similar to how Apache, NGINX, and other web servers work.
In this article, we'll describe how to set up and host a static site using AWS S3.
Background
S3 works by allowing users to define buckets, collections of files that can be accessed at the same URI. Each bucket has its own set of access rules that determine who is able to access and upload files to it, as well as other properties like encryption and version control. S3 also allows you to replicate buckets across data centers, which adds redundancy and reduces access times for users in distant regions.
S3 buckets are most commonly used to store static content, such as images, videos, and documents. Many sites use S3 to store user-uploaded content, and most web server frameworks have plugins that enable easy access to S3 for that purpose. We can also use S3 to serve static sites, or sites that do not rely on a web server to dynamically generate HTML files.
Now, we will describe the steps to set up and host your static site using AWS S3.
1. Create an S3 bucket
The first step is to create and name your bucket.
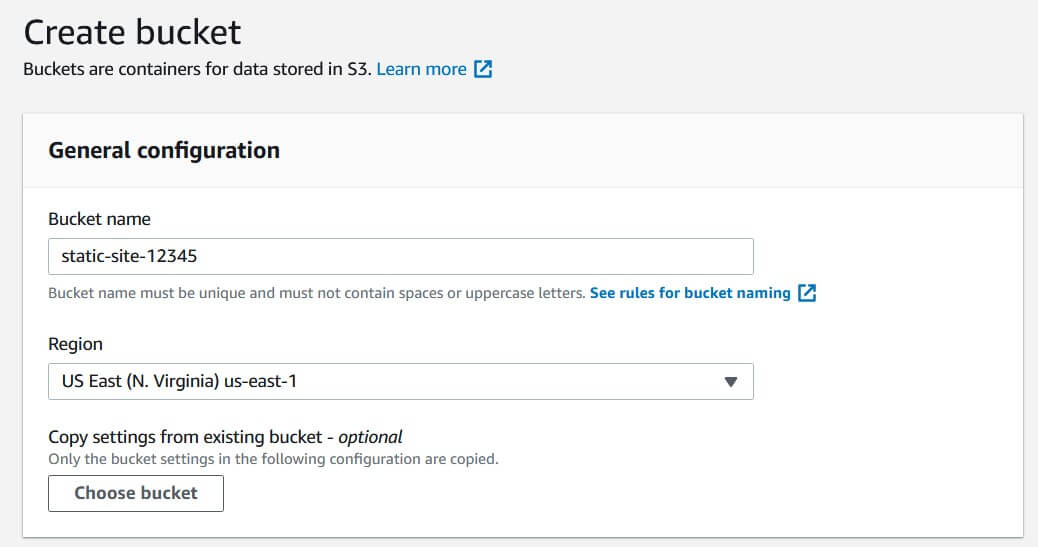
- In the AWS console, navigate to the S3 dashboard.
- In the Buckets tab, click Create bucket.
- Give your bucket a name. This name must be unique across all S3 buckets in your partition (a grouping of regions: aws, aws-cn, or aws-us-gov). If you intend to attach a custom domain to your site later via Route 53, this name needs to be identical to the root domain of the site (e.g. example.com).

Next, we'll discuss settings for restricting public access to your bucket. By default, S3 blocks all unauthorized access to your bucket to ensure the privacy of your data. However, this will make our static site inaccessible to regular users.
- Uncheck Block all public access and accept the warning that displays below. This gives us finer control over how public access can be granted.
- Check Block public access to buckets and objects granted through new access control lists (ACLs) and Block public access to buckets and objects granted through any access control lists (ACLs). These settings restrict the use of access control lists, which grant read/write permissions to specific AWS users. However, we will not be using this feature because we want to grant access to users not authenticated with AWS.
- Leave Block public access to buckets and objects granted through new public bucket or access point policies and Block public and cross-account access to buckets and objects through any public bucket or access point policies unchecked. We will be adding a new bucket policy later to grant public access to this bucket.
- Click the Create button at the bottom of the screen to create your new bucket.
2. Upload site files to your bucket
The next step is to upload the static site files that define the website into the S3 bucket. If you have an existing set of static files (HTML/CSS/Javascript) that defines your site, that is what you will upload.
If you don’t have an existing project to host, you can use the following sample files. These simulate the contents of a proper website and will all be accessible by end users:
An html file defining the site structure called index.html:
<!DOCTYPE html>
<html>
	<head>
		<title>S3 Static Site</title>
		<link rel='stylesheet' href='index.css'>
		<script src='index.js'></script>
	</head>
	<body>
		<h1>Hello world!</h1>
		<button onclick='onClick()'>Click me!</button>
	</body>
</html>
A CSS file defining site styles called index.css:
body {
    background-color: #002130;
    color: #f7f7f7;
    font-family: 'Segoe UI', Tahoma, Geneva, Verdana, sans-serif;
}
A Javascript file adding site functionality called index.js:
function onClick() {
    alert('Click!');
}
Here are the steps for performing the upload to AWS S3:
- In the S3 dashboard, click on your new bucket to navigate to its overview page.
- In Objects, click Upload. In Files and Folders, upload your project files, then click Upload.
- Once everything is done uploading, click Exit to return to the bucket dashboard.

Note that manually uploading files this way can get tedious over time. For convenience, you may want to look into using AWS CLI to programmatically sync your local directory with an S3 bucket.
3. Configure your bucket for static site hosting
Now we will perform some additional configuration to configure the bucket specifically for static site hosting, as opposed to standard hosting for static files.
- In your bucket’s dashboard page, click on the Properties tab.
- Scroll down to Static website hosting and click Edit.
- Select Enable, then “Host a static website”. Write index.html or your existing project’s index page as your index document.
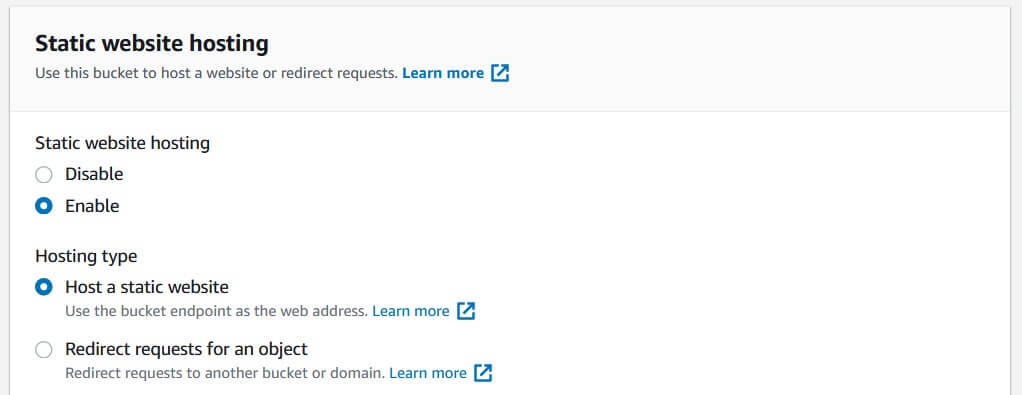
- If you are using an existing project, you can specify an existing error document as well. If not, write index.html as your error document for testing purposes.
- Click Save changes to publish your website.
If you scroll down in the Properties tab again, you will see your site’s URL listed in the Static website hosting section. Navigating here will return a 403 Forbidden error, since we have not made our files fully public yet.
4. Make your site files publicly accessible
Lastly, we'll finalize the security configuration so that our static site is accessible to the public.
- In your bucket’s dashboard page, go to the Permissions tab.
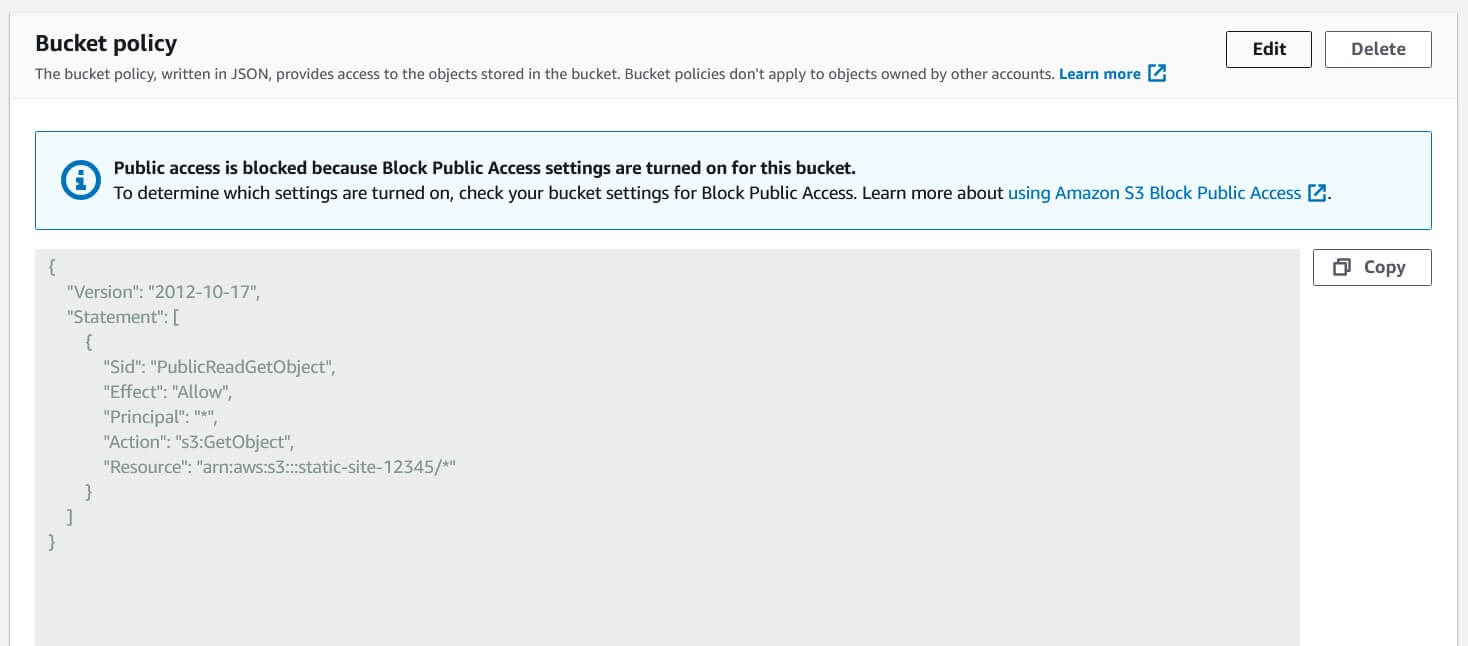
- In the Bucket policy section, click Edit and paste in the following JSON, replacing
<BUCKET_NAME>with the name you chose for your S3 bucket:
{
	"Version": "2012-10-17",
	"Statement": [
		{
			"Sid": "PublicReadGetObject",
			"Principal": "*",
			"Effect": "Allow",
			"Action": [
				"s3:GetObject"
			],
			"Resource": [
				"arn:aws:s3:::<BUCKET_NAME>/*"
			]
		}
	]
}
The above JSON snippet is an S3 bucket policy. It allows you to grant or deny read/write access to the entire bucket, as opposed to using access control lists to grant access to individual files. Here is a breakdown of each statement:
Version: This defines the syntax version of the policy file. This should always be set to '2012-10-17' so that you can use the latest AWS features.
Statement: A list of statements, or individual policy rules. You can define multiple rules in a single file if you want to, for example, allow everyone to retrieve objects but only grant upload permissions to certain users.
Sid: This stands for statement ID. These must be unique to each statement in the file.
Principal: This determines which AWS users are affected by this rule. In our case, we are setting this to * to cover all users, even anonymous ones.
Action: A list of actions to define the policy for. We are controlling object retrieval (s3:GetObject), but you could also add actions like object uploads (s3:PutObject) and bucket creation (s3:CreateBucket).
Effect: This controls whether to allow or deny the defined actions.
Resource: A list of resources that this policy applies to. In our case, we are defining the resource name of this bucket, but you could add other bucket names here to control multiple buckets under the same policy.
Once you are done writing your bucket policy, scroll down and click Save changes.
If you navigate to your bucket’s public URL again (found in Properties > Static website hosting), you should be able to see Hello World! on a dark background with a functioning button, or your existing project’s index page.
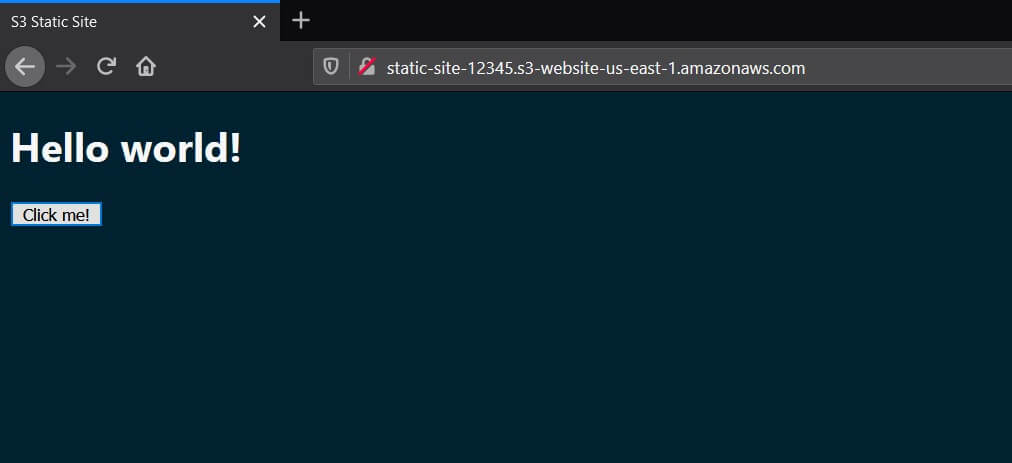
Congratulations! Your site is now hosted and publicly accessible! Now that your site is hosted, you'll likely want to point your domain to it using AWS Route 53.
Conclusion
In this article, we discussed how to set up and host a static site using AWS S3.
If you're interested in learning more about Amazon Web Services, check out The Most Complete Guide to Amazon Web Services from Beginner to Advanced Level.
We hope you enjoyed this post! Feel free to shoot me an email at jacob@initialcommit.io with any questions or comments.
Final Notes
Recommended product: Coding Essentials Guidebook for Developers

