Using AWS Route 53 to Publish S3 Static Site on Custom Domain
ADVERTISEMENT
Table of Contents
- Introduction
- 1. Set up a Route 53 hosted zone
- 2. Add domain records for your S3 bucket
- 3. Set up
www.subdomain redirects - Conclusion
Introduction
Route 53 is an Amazon Web Services (AWS) product that simplifies domain management. It allows you to set up hosted zones, containers of DNS records that specify how requests to your domain name should be handled. Hosted zones can be used to connect AWS resources (e.g. EC2 resources, EKS clusters, S3 static websites) to your domain, using load-balancing and latency minimization techniques for configurations with multiple servers to ensure an optimal user experience. In this article, we will be using Route 53 to publish a static site hosted using AWS S3 to a custom domain.
1. Set up a Route 53 hosted zone
If you have previously purchased a domain name from AWS, this step should already have been completed automatically. If not, read below to configure a hosted zone for a domain purchased elsewhere.
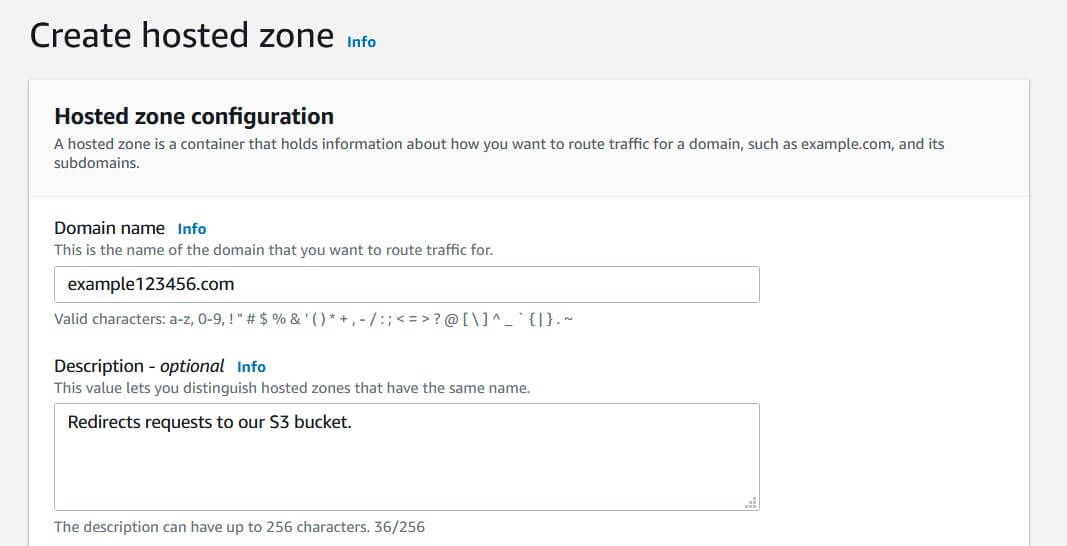
- In the AWS console, navigate to the Route 53 dashboard.
- In the left-hand menu, click Hosted zones, then click Create hosted zone.
- In Domain name field, add your base-level domain (e.g.
example.cominstead ofwww.example.com).

- Under Type, select Public hosted zone. This tells Route 53 to accept incoming requests from the public, instead of only from other AWS resources.
- Click Create hosted zone to set up your hosted zone.
- Your hosted zone’s console should now show two DNS records. The NS record lists the name servers that service that domain, while the SOA one specifies the server that has authority over domain ownership.
Note: If AWS is not your domain provider, you need to set your domain to use the four URLs listed in the NS record as its name servers. Here is a guide for how to do this for Google Domains. Other providers should have similar instructions.
2. Add domain records for your S3 bucket
- In your hosted zone’s console, click Create record. You should now be viewing the record creation wizard (see screenshot). If your screen looks different, try clicking Switch to wizard.
- Select Simple routing as your policy type. This tells Route 53 to redirect all requests to your domain to one specific AWS resource. Other policies, such as Latency and Weighted, can be used for load balancing and distributed servers.
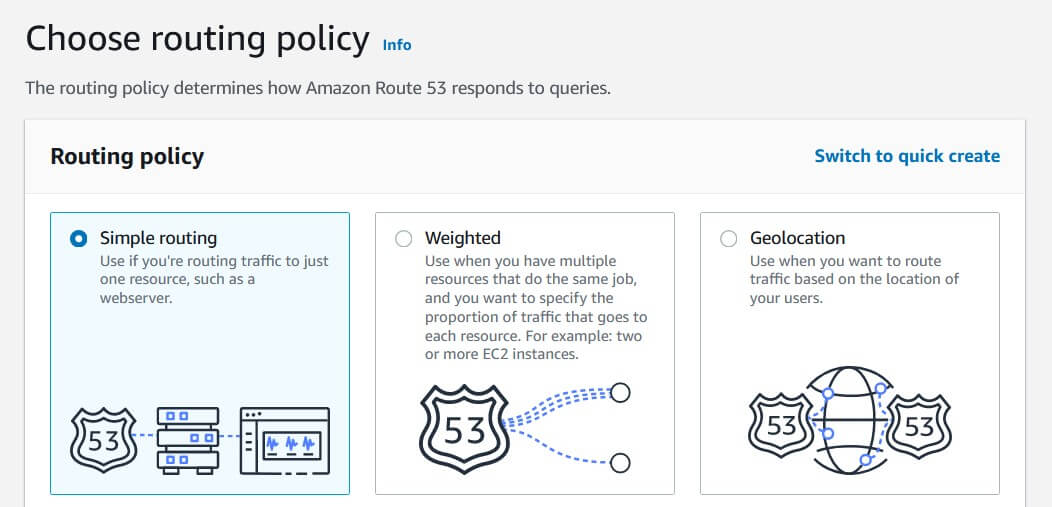
- Click Define simple record. In that dialog, leave Record name blank to target your base-level domain (e.g.
example.com). - In Value/Route traffic to, select Alias to S3 website endpoint, then choose the region that contains your S3 bucket. Then, select your S3 bucket in Choose S3 bucket. If it doesn’t appear, make sure that your bucket name is identical to your hosted zone name.
- Under Record type, select A - Routes traffic to an IPv4 address and some AWS resources.
- Leave Evaluate target health checked. This causes Route 53 to drop all requests if your S3 bucket is unavailable, but this is unlikely to ever occur.
- Click Create simple record, then click Create records.
At this point, your domain is set up to redirect to your S3 website. It usually takes just a few minutes for these changes to go into effect, but it could take up to 24 hours for the updated DNS records to propagate through AWS’s servers and the wider internet.
One caveat is that some browsers and users will attempt to add the www. subdomain as a prefix when browsing to your site, which your Route 53 hosted zone is not configured to respond to. In the next section, we'll discuss how to redirect requests to the www. subdomain to the base-level domain.
3. Set up www. subdomain redirects
- Since Route 53 records must be named identically to the S3 buckets they forward requests to, we must create a new S3 bucket with the
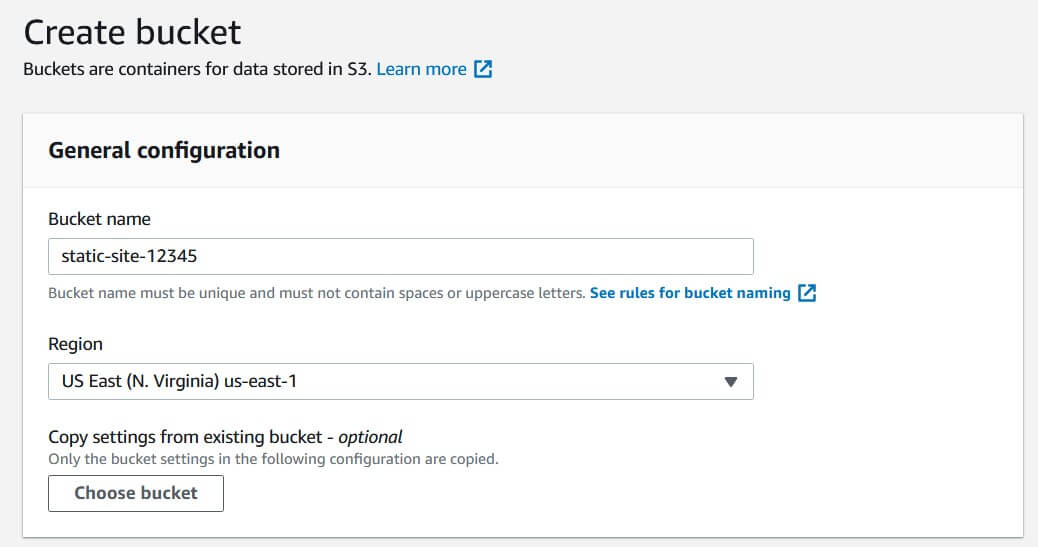
www.prefix added. - In the S3 management console, click Create bucket.
- In Bucket name, write your domain with the
www.prefix (e.g.www.example.comfor a base domainexample.com).
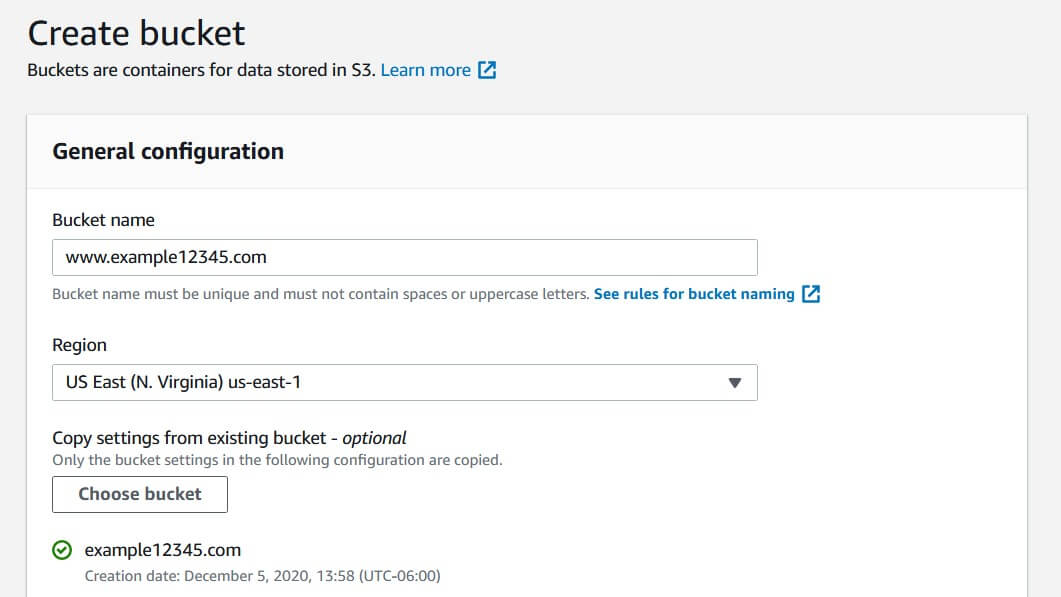
- Under Copy settings from existing bucket, click Choose bucket and select the S3 bucket containing your website.
- Click Create bucket to set up your subdomain bucket.
- You may need to accept the warning that appears under Bucket settings for public access first.
- In your bucket’s dashboard, go to Properties. Scroll down to Static website hosting and select Edit.
- Under Static website hosting, click Enable. Then, in Hosting type, select Redirect requests for an object. Lastly, write your base domain (e.g.
example.com) under Host name. This will redirect all requests to thewww.subdomain to your base domain. - Click Save changes to configure your bucket for redirecting.
- Repeat the instructions in step 2 with two following changes. Instead of leaving Record name blank, enter
www.to target that subdomain. When asked to choose an S3 bucket, select your new subdomain bucket instead of the original one we created for the static site.
You should now be able to navigate to the www. subdomain for your website and be redirected to your base domain. As before, this change should take effect in a few minutes, but the new domain record may take up to 24 hours to fully function.
Conclusion
In this article, we discussed using AWS Route 53 to publish a static site hosted using AWS S3 to a custom domain.
If you're interested in learning more about Amazon Web Services, check out The Most Complete Guide to Amazon Web Services from Beginner to Advanced Level.
We hope you enjoyed this post! Feel free to shoot me an email at jacob@initialcommit.io with any questions or comments.
Final Notes
Recommended product: Coding Essentials Guidebook for Developers

