Using AWS CloudFront as a CDN for an S3 Static Site
ADVERTISEMENT
Table of Contents
- Introduction
- Step 1: Obtain an SSL certificate
- Step 2: Create a CloudFront distribution
- Step 3: Configure Route 53
- Conclusion
Introduction
S3 is Amazon Web Services' premier product for delivering static content, such as images, videos, and documents, at low latency. However, S3 can also be used to host full-fledged static websites, such as those produced by React and Vue projects. Hosting a site in this manner is both cost-effective and fast, as AWS hosts it on their servers in an optimal environment.
Despite this, a client's connection to Amazon's servers can be anything but ideal. S3 buckets are hosted in a single AWS region, such as North Virginia or Ohio, but users can connect from anywhere in the world. A client downloading an S3-hosted website from halfway across the globe will experience a higher latency regardless of S3's efficiency.
Amazon's solution to this is CloudFront, a global content delivery network (CDN) that caches resources from a website to reduce subsequent load times. When a user requests your S3 site through CloudFront, the site's static files will be cached at an edge server (also known as an edge node) closest to the client's geographical location. After that, all other users in that region requesting the same site will receive the cached version, eliminating a lengthy trip to the server and reducing overall latency.
Caching using AWS CloudFront is an effective way to accelerate access to any AWS resource, though the benefit is seen best with applications like S3 static sites, S3 buckets with large static resources like images or videos, EC2 servers, and Lambda functions. For these resources, serving content through CloudFront can be both faster and cheaper than accessing them directly, since cache hits in CloudFront do not utilize any resources at the origin (i.e. the source S3 bucket or other resource).
In this article, we will learn how to connect an S3-hosted static site to a CloudFront distribution, using Route 53 for DNS routing and Certificate Manager for SSL certification. This article assumes that you already have a static site uploaded to S3 and connected to a Route 53 hosted zone. If you have not yet set both of these up yet, you can follow our S3 static site tutorial to get an example site set up and our Route 53 publishing tutorial to connect it to your domain using AWS Route 53.
Step 1: Obtain an SSL certificate
In order to connect a custom domain name to your CloudFront distribution, you will need to acquire an SSL certificate. AWS Certificate Manager (ACM) will provide certificates for free and is the optimal choice for those using Route 53 and other AWS services.
- In the Certificate Manager dashboard, click Request a certificate.
- In the next screen, leave Request a public certificate checked and click Request a certificate in the bottom right.
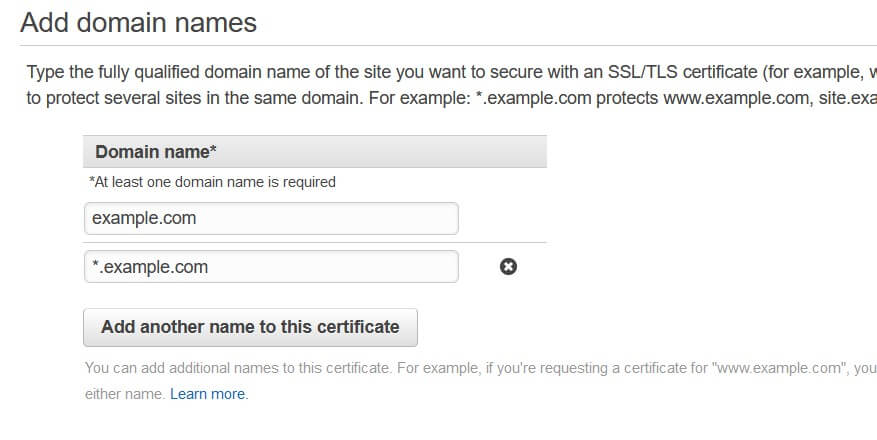
- On the next page, type in your base-level domain (e.g.
example.com). To support arbitrary subdomains (e.g.www.example.comandtest.example.com), click Add another name to this certificate and write in your domain with an asterisk as the subdomain (e.g.*.example.com). Click Next to continue.
- ACM will now allow you to select your verification method. Since we are using AWS Route 53, DNS validation will be the easiest option. Select it and click Next.
- The next screen will allow you to add tags for easier management. You can leave this blank and click Review, then click Confirm and request.
- ACM will require you to set one unique CNAME for each domain name to verify that you have access to the domain. Inside each dropdown, you can click Create record in Route 53 to automatically perform this process. Once both records show Success, you can continue to the next step.
Step 2: Create a CloudFront distribution
A CloudFront distribution describes how AWS should cache files from your origin of choice - in this case, an S3 bucket. It sets the cache time, the parameters used to check cache validity ("which headers need to match from the cached request?"), the applicable domains/subdomains, and more.
-
In the CloudFront management console, click Create distribution. You will be given the option to choose between hosting a web distribution and an RTMP distribution; choose the former to host web content like HTML, CSS, and JS files.
-
Fill in the origin settings as follows:
Origin Domain Name: Clicking on this field should provide you with a list of applicable AWS resources. Select your S3 bucket.
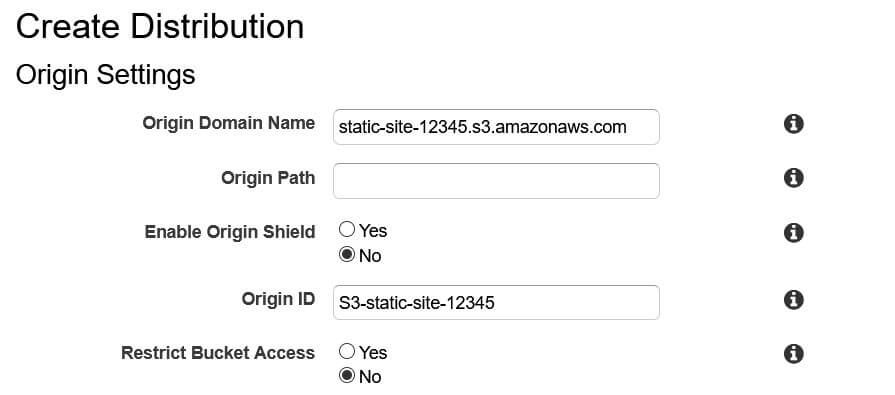
Origin Path: This optional parameter lets you set a root path to host files from. This can typically be left blank unless your site's index.html file is hosted in a separate directory (e.g. dist/).
Enable Origin Shield: Origin Shield configures edge servers to contact a central cache upon a cache miss. This central cache can reduce latency (if located in the same region as your origin resource) and reduce the number of requests sent to the origin resource. You can choose to enable this and set its AWS region, though this will incur extra charges.
Origin ID: This is a descriptive name for this origin. It must be unique within its distribution. The pre-filled ID should be sufficient.
Restrict Bucket Access: This forces all users to access your S3 bucket through your CloudFront URL instead of directly through your S3 URL. We will not be using this feature, as we intend to accelerate access, not restrict it.
Origin Connection Attempts: This is the maximum number of times that CloudFront edge servers will attempt to retrieve content from your S3 bucket before failing. Leave it at the default of 3.
Origin Connection Timeout: This is the duration, in seconds, of each attempted connection to the origin server. Requests that last longer than this are assumed to have timed out. The default of 10 seconds should suffice.
Origin Custom Headers: You can choose to set custom headers to requests made from CloudFront edge servers to the origin. Since S3 buckets do not respond to any particular headers, we can leave this blank.
- Set the following cache behavior settings:
Viewer Protocol Policy: This determines whether to allow, redirect, or decline insecure HTTP requests. We recommend setting this to Redirect HTTP to HTTPS for an optimal blend of security and compatibility.
Allowed HTTP Methods: This determines the types of HTTP methods that should be cached. The default of GET and HEAD is sufficient for an S3 static site; this will cache site content and metadata about that content, the only two relevant methods.
Cache and origin request settings: Select Use a cache policy and origin request policy. This is the recommended setting and allows the most control over how to cache content.
Cache Policy: This tells CloudFront how to store cached content, including the request parameters to use for determining cache hits. In general, you should store as little information as possible to minimize the frequency of cache misses. We recommend using the Managed-CachingOptimized preset, which has the following settings:
- Maximum cache time-to-live (TTL) of one year, default TTL of one day
- Do not cache headers, cookies, or query strings
- Enable Gzip and Brotli compression
Origin Request Policy: This field allows you to determine which request properties to forward to the origin resource on a cache miss. For an S3 static site, we recommend the Managed-CORS-S3Origin preset, which has the following settings:
- Only send the
origin,access-control-request-headers, andaccess-control-request-methodheaders - Do not send cookies or query strings
Smooth Streaming: Microsoft Smooth Streaming is a protocol for automatically adjusting the quality of a video download stream based on connection reliability. You can enable this at no extra cost if you plan on serving videos directly from your S3 site's bucket.
Restrict Viewer Access: This allows you to restrict access to clients with CloudFront-signed cookies and URLs. As with the previous Restrict Bucket Access setting, we will be leaving this disabled.
Compress Objects Automatically: If this is enabled, CloudFront will automatically compress your site's content in the Gzip and Brotli formats. Most browsers support at least one of these compression protocols, so enabling this setting is an effective way to reduce bandwidth and thus lower your total CloudFront costs.
The remaining settings configure features that are not relevant to hosting a S3 static site. You can leave them at their default settings.
- Fill in the following distribution settings:
Price Class: This setting determines which regions CloudFront will cache your content within. Use All Edge Locations will result in the best global performance, while Use Only U.S., Canada and Europe is (at time of writing) the cheapest option.
Alternative Domain Names: This lets you configure the domain names at which to serve your URL. This does not configure DNS routing for you, but only sets the valid domains to receive requests for. Write your base domain name here (e.g. example.com).
SSL Certificate: This determines which SSL certificate to use. Click Custom SSL Certificate and select the certificate you created earlier.
Custom SSL Client Support and Security Policy both configure legacy support. Leave them at their defaults for maximum security and to avoid extra costs.
Supported HTTP Versions: This tells CloudFront which versions of HTTP to use. Leaving this at the default setting is recommended.
Default Root Object: This determines which object is returned when a user requests your root domain (e.g. https://example.com instead of https://example.com/index.html). For an S3 static site, you should set this to index.html or the path to your project's index page.
Standard Logging: If enabled, CloudFront will log all viewer requests to an S3 bucket of your choosing. We will not be using this feature in this tutorial.
Enable IPv6: IPv6 is a newer IP protocol that supports a much larger address space than IPv4. Nearly all devices support IPv6 now, including all AWS services, so this can safely be left checked.
Distribution State: This tells CloudFront whether it should accept requests or not. You should leave this enabled now, but you can disable it temporarily later to restrict access to your site.
- Click Create Distribution to set up your new distribution. The main dashboard will now show your distribution's status as In Progress to indicate that it is actively configuring CloudFront's edge servers. Once the status shows as Deployed, you can go to your distribution's domain to see your website.
Step 3: Configure Route 53
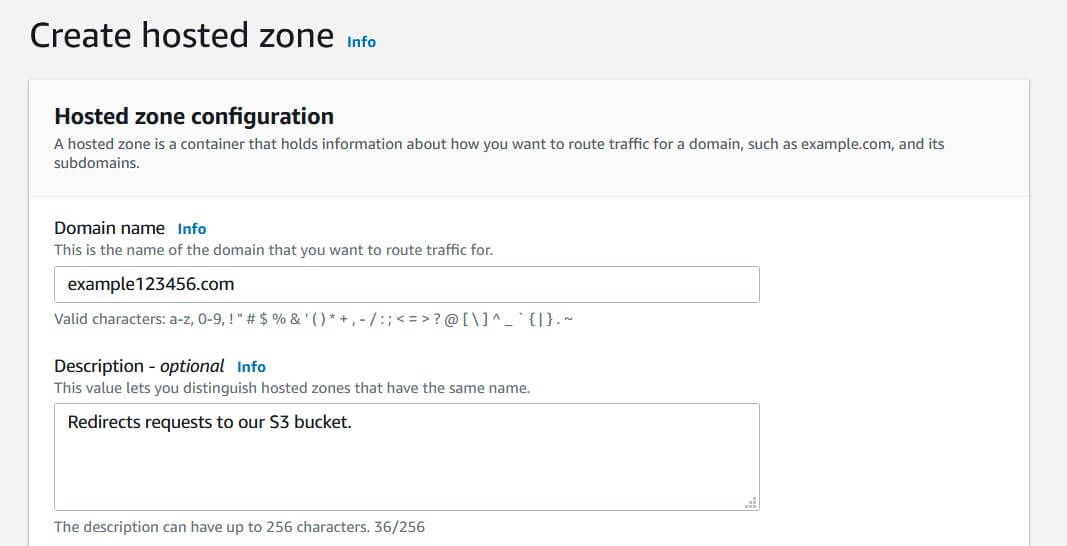
We can now configure our Route 53 hosted zone to redirect to our CloudFront distribution instead of our S3 bucket. This will ensure that all requests run through CloudFront's edge servers and make use of caching.
-
In the Route 53 dashboard, navigate to your hosted zone. Select and delete any existing A records that route traffic to your S3 bucket, since we want all requests to go through CloudFront.
-
Click Create record. This should take you to the record creation wizard (pictured above); if your screen looks different, click Switch to wizard in the top right corner.
-
Select Simple routing, since we want CloudFront to handle finding the lowest-latency route for us. Click Next to continue.
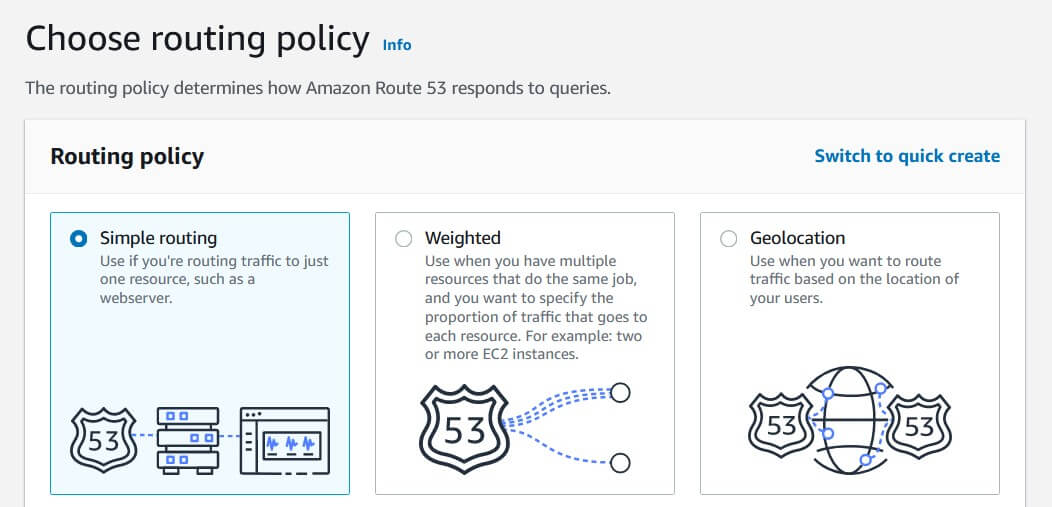
- Click Define simple record and enter the following information:
Record name: Leave this blank to target your base domain name.
Value/Route traffic to: Select Alias to CloudFront distribution, then select your distribution below.
Record type: Leave this as A to create a simple routing record.
Evaluate target health: Leave this unchecked, since CloudFront will automatically drop requests when the S3 bucket goes offline (which should never happen).
-
Click Create records to create your base domain record. This configures Route 53 to send all requests from your base domain name to your CloudFront distribution, which will itself send requests to your S3 bucket. You should be able to test this by navigating to your base domain name (e.g.
example.com) in your browser, though it may take up to 24 hours for these changes to take effect. -
In order to configure the
www.subdomain, we will need to create another simple record. In your hosted zone's dashboard, click Create record and select Simple routing. -
Define a new simple record with the following settings:
Record name: Set this to www to target that subdomain.
Value/Route traffic to: Select Alias to another record in this hosted zone, then select your base domain name. This will forward all requests from the subdomain to the same resource as the base domain.
As before, leave Record type as A.
Leave Evaluate target health checked. Unlike the previous record, we want Route 53 to handle health checks here. This will cause your www. subdomain to reject requests if your base domain becomes unavailable.
- Click Create records to create your subdomain record. After your changes propagate (up to 24 hours, but should only take a few minutes), you should be able to navigate to your site via the
www.subdomain (e.g.www.example.com).
Conclusion
In this article, we discussed how to connect an S3-hosted static site to a CloudFront distribution, using Route 53 for DNS routing and Certificate Manager for SSL certification.
If you're interested in learning more about Amazon Web Services, check out The Most Complete Guide to Amazon Web Services from Beginner to Advanced Level.
We hope you enjoyed this post! Feel free to shoot me an email at jacob@initialcommit.io with any questions or comments.
Final Notes
Recommended product: Coding Essentials Guidebook for Developers

